
The 5-point pattern explained round by round, mini stars for the tree and gift wrap, a stiff tree topper, the 5-petal...
0
Carrello della spesa
0 prodotti
Search in blog
Blog categories
Latest posts
5 cozy hobbies to try to switch your brain off
Read more
Read More
Turn off notifications, slow down and let your hands do the work. From timeless classics like crochet and embroidery...
Crochet and Knit Cowl: Patterns, Tutorials and Yarns
Read more
Read More
A warm, soft neck warmer made by you: our makers' tutorials in crochet and on circular needles, sizes for women, men...
Crochet doesn’t hibernate: here’s how we’ll wear it this fall
Read more
Read More
Autumn 2026 crochet trends are all about details, layering and texture. From fringed ponchos and vests to crochet...
Christmas crochet decorations: ideas, patterns and yarns
Read more
Read More
Baubles, stars, wreaths, houses and amigurumi: all the Christmas decorations to crochet, with step-by-step tutorials...
Popular posts

Summer 2026 Crochet Bags: the Trending Models
Mini, medium, maxi or shopper? Discover the crochet bag models trending for summer 2026, with the Tessiland creators'...
Read more
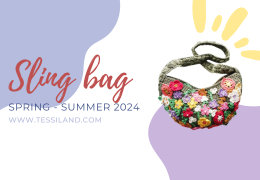
Crochet bags for spring summer 2024. 5 models of handmade sling bags.
Discover the latest trends for Spring/Summer 2024 with our exclusive guide to 5 crochet sling bag models. Perfect for...
Read more
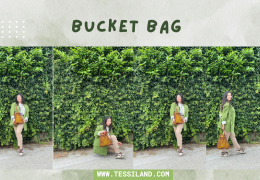
The Crochet Net Bucket Bag: A Trendy Accessory for 2024
Learn how to make a crochet net bucket bag with our simple and detailed tutorial. Use elastic cord, a size 5 crochet...
Read more
Crochet rugs, a passion that is becoming a trend.
In this article, dive into the art of crochet rugs and discover how to create unique and personalized pieces for your...
Read more
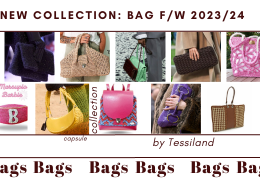
From runways to street style: the trendiest crochet bags.
Are you also passionate about handmade items and want to create your own capsule collection of crochet bags? Here are...
Read more

Macramé: what it is, the basic knots explained and how to start
Macramé: what it is, the basic knots explained and how to start
Macramé is the art of creating fabric and decorations by knotting threads with your hands alone: no crochet hook, no needles. Born centuries ago and back in the spotlight with boho style, it is booming today: wall hangings, plant hangers, bags, jewellery. In this guide you will find what macramé is, the basic knots step by step, the right materials and the first projects to try.
What is macramé (in a nutshell)
The word probably comes from the Arabic migramah, "knotted fringe". The technique reached Europe with Arab weavers and sailors spread it through ports around the world. The essence has not changed: cords are interlaced and knotted following knot patterns. From a handful of fundamental knots, endless textures are born. It is a relaxing, inexpensive technique for everyone: if you can tie a knot, you can do macramé.
The basic macramé knots, step by step
All macramé is built with five fundamental knots. Learn them in this order and you will be able to read any pattern.
1. Lark's head knot (the mounting knot)
This is the knot you use to mount the cords onto the support (a stick, a ring, a bar). Fold the cord in half, pass the loop behind the support and pull the two ends through the loop. Tighten: the cord is attached. Repeat for all the cords you need.
2. Square knot (flat knot)
The most used knot of all. It works over 4 cords: the 2 central ones stay still (core cords), the 2 outer ones knot. Bring the left cord over the core and under the right one; then the right cord under the core and through the left loop. Tighten. Repeat mirrored (start from the right) and you have a complete square knot. In sequence it creates the classic flat bands of wall hangings and bracelets.
3. Half knot (and the spiral)
It is half a square knot: always repeat the same side (for example, always start from the left) and the band will naturally twist on itself, creating the spiral — one of the best-loved effects for plant hangers and keyrings.
4. Double half hitch (clove hitch)
The knot that "draws": each cord is knotted, one at a time, around a guide cord held horizontally or diagonally. Two tight wraps of each cord around the guide and you get a raised line. With diagonals you create diamonds, zigzags and the leaves you see in boho wall hangings.
5. Simple finishing knot and fringes
To finish a piece: a tight simple knot at the base of the cords, then trim the fringes to the desired length and comb them with a fine-tooth comb for the feathered effect. It is the final touch of dreamcatchers and wall hangings.
Which cord for macramé? The materials to start
The golden rule: a 3-5 mm cotton cord, soft to knot but firm enough to hold the knot. Our picks to get started:

Olly — thick cotton blend cord
The generous calibre that makes knots stand out: perfect for wall hangings and plant hangers.
Discover Olly →
The generous calibre that makes knots stand out: perfect for wall hangings and plant hangers.
Discover Olly →

Tornado — matte round cord
Soft hand and clean finish: the ally of square knots and spirals.
Discover Tornado →
Soft hand and clean finish: the ally of square knots and spirals.
Discover Tornado →
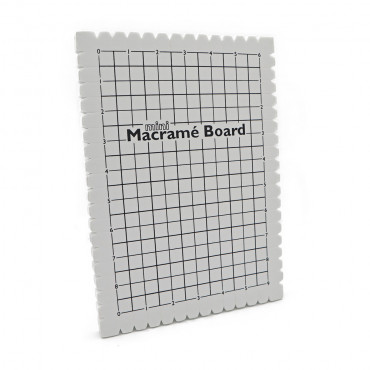
Mini Macramé Board
The work surface with grid and stoppers: it keeps your cords in order while you knot.
Discover the board →
The work surface with grid and stoppers: it keeps your cords in order while you knot.
Discover the board →
For macramé jewellery (bracelets, anklets) the right thread is thinner: 1 mm waxed cotton holds the knot perfectly. And to explore all the cords, there is the cords for bags and macramé category.
Your first macramé projects, easiest first
- Keyring: 4 cords, square knots and a fringe. One hour of work and you have your first macramé;
- Bracelet: waxed cotton, square knot or spiral, one bead in the centre;
- Plant hanger: spirals and square knots worked vertically — instant boho effect;
- Dreamcatchers and feathers: double half hitches on a ring + combed fringes;
- Wall hanging: the iconic project — wooden stick, hitch diamonds and long fringes;
- Macramé bag: the next step, with 200 g cords and the right bag handles.
Frequently asked questions
What is the difference between macramé and crochet?
Macramé is worked with the hands only, knotting cords; crochet uses a hooked needle to form stitches. Macramé gives sculpted, geometric textures, crochet gives more fluid fabrics. Many makers combine them in the same project.
Which cord is used for macramé?
A 3-5 mm cotton cord for wall hangings, plant hangers and bags; 1 mm waxed cotton for jewellery. You will find them all in the cords for bags category.
Is macramé hard to learn?
No: two knots are enough (lark's head and square knot) to complete your first project. The learning curve is gentle — the keyring takes an hour — and the technique is so rhythmic it becomes relaxing.
How much cord does a project need?
Rule of thumb: cut each cord 4-5 times the finished length of the piece (8-10 times if folded in half with a lark's head). Better to overestimate: knots eat up more cord than you think.
Now you have the knots, the materials and the projects: all that's left is to cut your first cords and let your hands find the rhythm. We can't wait to see your first macramé!
Rosaria Tessiland®
.jpg)





Leave a comment