
Three ways to make crochet Christmas baubles: the amigurumi sphere with a round-by-round pattern, mesh-covered...
0
Carrello della spesa
0 prodotti
Search in blog
Blog categories
Latest posts
Crochet Christmas Star: Easy Pattern, Mini Stars and Tree Topper
Read more
Read More
The 5-point pattern explained round by round, mini stars for the tree and gift wrap, a stiff tree topper, the 5-petal...
5 cozy hobbies to try to switch your brain off
Read more
Read More
Turn off notifications, slow down and let your hands do the work. From timeless classics like crochet and embroidery...
Crochet and Knit Cowl: Patterns, Tutorials and Yarns
Read more
Read More
A warm, soft neck warmer made by you: our makers' tutorials in crochet and on circular needles, sizes for women, men...
Crochet doesn’t hibernate: here’s how we’ll wear it this fall
Read more
Read More
Autumn 2026 crochet trends are all about details, layering and texture. From fringed ponchos and vests to crochet...
Popular posts

Summer 2026 Crochet Bags: the Trending Models
Mini, medium, maxi or shopper? Discover the crochet bag models trending for summer 2026, with the Tessiland creators'...
Read more
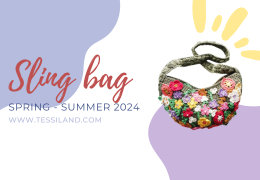
Crochet bags for spring summer 2024. 5 models of handmade sling bags.
Discover the latest trends for Spring/Summer 2024 with our exclusive guide to 5 crochet sling bag models. Perfect for...
Read more
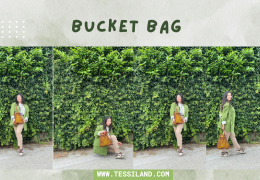
The Crochet Net Bucket Bag: A Trendy Accessory for 2024
Learn how to make a crochet net bucket bag with our simple and detailed tutorial. Use elastic cord, a size 5 crochet...
Read more

Crochet rugs, a passion that is becoming a trend.
In this article, dive into the art of crochet rugs and discover how to create unique and personalized pieces for your...
Read more

From runways to street style: the trendiest crochet bags.
Are you also passionate about handmade items and want to create your own capsule collection of crochet bags? Here are...
Read more

How to line a crochet bag: the complete guide with 3 techniques
How to line a crochet bag: the complete guide with 3 techniques
"How do I line my crochet bag?" is one of the questions we hear most often. The lining is the final step. It turns a pretty bag into a truly finished bag: it protects your work, adds structure and makes it usable every day. Does this step stress you out? No panic. In this guide you will find the right fabric, the materials and three step-by-step techniques. Plus a shortcut for those who do not want to sew at all.
.png)
Which fabric should you choose for a bag lining?
Choose the fabric before picking up scissors and pins. Not every fabric works. You often see bags lined with fabric scraps from shirts or dresses, or with light chiffon. They look nice, but daily use wears them out. And replacing a worn lining means unpicking everything. We put everything in our bags, from car keys to scissors: the lining must withstand thousands of stresses without giving way.
That is why the most reliable choice is Ottoman cotton: its weave gives it a strength designed for bags, with a clean and elegant look.

Ottoman lining in pure cotton
The high-strength fabric designed for bags, in many colours to match your yarn.
Discover the Ottoman lining →
The high-strength fabric designed for bags, in many colours to match your yarn.
Discover the Ottoman lining →
You will find all cotton lining fabrics in the dedicated category: cotton fabrics for bag linings.
Ready-made lining or DIY?
Before moving on to scissors and needle, an honest question: do you really want to sew the lining from scratch? If the answer is no, there are ready-made linings. They are pre-sewn bags sized for crochet bags. You attach them with a few stitches along the edge. The result is professional and it takes minutes.

Ready-made lining with inner pocket
Pre-sewn, with a handy pocket: insert it and stitch it along the edge.
Discover the ready-made lining →
Pre-sewn, with a handy pocket: insert it and stitch it along the edge.
Discover the ready-made lining →

Ottoman cotton inner bag with drawstring
The pouch-style lining with drawstring closure: practical and very quick to fit.
Discover the Ottoman inner bag →
The pouch-style lining with drawstring closure: practical and very quick to fit.
Discover the Ottoman inner bag →
All the ready-made options are in the lining bags category. Do you prefer the full DIY experience? Keep reading: time to sew!
Adhesive and stiff linings
Besides sew-in fabrics there are adhesive linings, in two versions. The single-sided one sticks on one side only. It stiffens the bag and comes in several colours: you can leave it visible. The double-sided one sticks on both sides. It is usually covered by gluing fabric on the visible side. These are the base of so-called stiff bag linings.
To give your bag structure, the right chapter is thermosetting stiffeners for bags. For a full overview of linings and fabrics there is the linings and fabrics category, where you will also find pre-formed shells.

Video: Ottoman linings explained by Andrea
Features and uses of Ottoman cotton for bags (in Italian).
Watch the video →
Features and uses of Ottoman cotton for bags (in Italian).
Watch the video →
What you need to line a bag: the materials
- Your finished crochet bag
- Lining fabric (Ottoman cotton recommended)
- Scissors and dressmaker pins
- Needle and sewing thread
- Tailor's chalk or marking pencil and a measuring tape
- Iron for finishing
How to line a crochet bag step by step
1. Prepare the bag
The bag must be clean, free of dust and loose threads. If needed, wash it gently by hand. Let it dry completely before continuing.
2. Measure and cut the fabric
Lay the fabric on a flat surface. Place the bag on top and trace the outline with chalk or a marking pencil. Leave a seam allowance of about 1.5 cm. Then cut along the lines, precisely: a well-fitting lining depends on this.
3. Sew the lining
Fold the fabric in half, right sides together. Pin it in place. Sew the sides with a straight or zigzag stitch, carefully: the seam must be strong. Leave a small opening on one side so you can turn the lining right side out at the end.
4. Finish and press
Trim the excess threads. Check that all seams are secure. Press with the iron at medium heat: the lining will be smooth and crease-free.
5. Fit the lining into the bag
Place the lining inside, matching corners and edges. Pin it along the top edge, taut and without folds. Then hand-stitch it with small, even stitches. Done: your bag now has a lining that makes it stronger and more functional.
How to line a rectangular or flat-bottom bag
For bags with a rectangular base there are two quicker variants, inspired by a video by La Fata Tuttofare. The numbers are a real example: adapt the measurements to your bag.
Separate-base technique
- Measure the base perimeter (in the example: 52 cm) and the bag height (23 cm);
- trace the base shape on the fabric and cut, keeping 1.5 cm from the line;
- with a tailor's square, cut a 52×23 cm rectangle (always with the allowance);
- sew the rectangle joining the two heights. Then pin the cut base following the guide lines;
- sew everything with needle and thread and fit the lining into the bag.
Single-pouch technique
- Start from the perimeter again (52 cm). To the height (23 cm) add the base height (5 cm): the rectangle becomes 52×28 cm;
- overlap the heights and sew the two ends;
- sew the bottom too: you will have 3 closed sides and one open, which stays as the opening;
- shape the base by sewing the side corners and trimming the excess fabric;
- you get a single pouch-style lining, ready to insert and stitch to the edge.

Video: the two techniques by La Fata Tuttofare
The video showing the separate base and the single pouch step by step (in Italian).
Watch the video →
The video showing the separate base and the single pouch step by step (in Italian).
Watch the video →
How to add a zip to the lining
Want a bag that closes? Sew a zip of the right colour and length directly onto the lining before inserting it. It goes along the pouch opening, with the same stitches shown above. You will find zips of every size, including by the metre, in the zippers category.
Frequently asked questions
How do you line a granny square crochet bag?
Like a rectangular bag: measure the perimeter of the squares and use the single-pouch technique. The inner fabric covers the typical granny "holes" and stops small items from slipping out.
How do you line a bucket bag?
The simplest solution is the drawstring pouch: it follows the bucket shape and the closure is built in. Alternatively, use the separate-base technique with a circular base.
Which fabrics should you avoid?
Scraps from shirts or dresses, chiffon and light fabrics: they wear out fast. And replacing the lining means unpicking everything. Choose a strong, tightly woven cotton like Ottoman.
Are there ready-made linings?
Yes: lining bags are pre-sewn linings, with pocket or drawstring. You attach them with a few stitches along the edge. The perfect shortcut if you do not enjoy sewing.
Now pick your technique and let your creativity loose. And you, which technique do you use to line your bags?
Rosaria Tessiland®
.jpg)





Leave a comment