


A trendy, practical guide to choosing the perfect zodiac jewelry: signs, colors, stones, and handmade...
spedizione gratuita presso un FERMOPOINT
€19.00
Carrello della spesa
0 prodotti
Sblocca
i tuoi premi
A trendy, practical guide to choosing the perfect zodiac jewelry: signs, colors, stones, and handmade...
In an increasingly grey-scale world, this article invites you to put color back into circulation with style and...
Discover what Tessiland’s VIP Room is: the Tuesday live at 5:00 PM where you’ll find previews, creative kits, and...
The crochet Toffee Bag is late winter 2026’s caramel bag: a cozy-chic design with a faux-fur detail, clean lines, and...
A mini magazine-style guide to celebrate Valentine’s Day with crochet: 3 projects made by us and paired with...


Christmas always arrives on tiptoe. First a TV commercial of a soft pandoro, the little lights on the neighbour’s balcony, then the smell of cinnamon warming up the kitchen again, and finally that irresistible desire to make the home cosier, more ours, magical for that time of year that transforms the atmosphere and even if inside us the flame that lit up during childhood seems to shine a bit less now, we still try to make everything feel a little more magical.
And what says “Welcome, Christmas is here!” better than a handmade door wreath?
In this tutorial I will guide you step by step in creating a soft, bright and super scenic Christmas wreath, perfect even if you don’t have much time and want a simple yet impressive project.
Ready to decorate your door with a touch of magic?
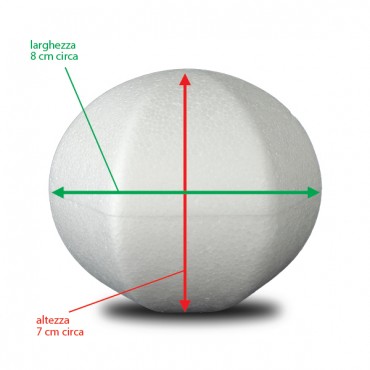
First, wrap the polystyrene ring with double-sided tape. This helps keep the yarns in place and gives a cleaner result.
Now start covering the base using Dion red and Dion white lurex yarns, alternating them to create a “Christmas slices” effect.
I made 8 slices in total:
Wrap each section by gently pulling the yarn and keeping it nice and compact. When the entire ring is covered, make a small knot on the back to secure the yarns: your wreath is officially wrapped!
The bow is the most scenic part of this wreath, and the Halley yarn – with its micro sequins – gives the perfect balance of elegance and brightness.
Central part of the bow
Work 66 chains.
Skip the first one and work 1 single crochet in each stitch.
At the end of the row, chain 1 and turn.
Continue for 12 rows in total, always working in the back loop only to achieve the ribbed effect.
Want a taller bow? Add a few rows.
Prefer it more compact? Reduce them. Super easy to customise!
The bow “tails”
Start 61 chains.
Work as above: 1 single crochet in each stitch, chain 1 at the end, turn.
Work 10 rows total, always in the back loop.
Assembling the bow
Using a tapestry needle, sew the two ends of the main part together to form a ring.
Attach the two tails underneath to create the classic bow shape.
Tighten the centre with a bit of Halley yarn to achieve the perfect “knot” effect.
Voilà: your bow is ready—bright, soft and fluffy!
 (260 x 180 px) (810 x 400 px).jpg)
Now comes the best part: bringing your wreath to life!
With Grace gold yarn, tie the three jingle bells to the centre of the ring: different sizes, jingling perfectly for a classic Christmas touch.
Place and secure the bow at the bottom or top — as you prefer! — always using needle and yarn.
On the back, create a small loop with the Grace yarn to hang the wreath on your door.
A project you can complete in under 2 hours.
And… here we are: your wreath is ready!
In less than two hours you’ve created a decoration that not only warms the home, but also tells something about you.
A wreath that welcomes those who enter, celebrates the wait, and brings a touch of magic with every glance.
May your Christmas be filled with creativity, twinkling lights, soft yarns and jingle bells ringing at just the right moment.
Happy Holidays and… happy handmade!
Rosaria Tessiland®
.jpg)

Leave a comment